|
||||||||||||||||||||||||||||||
|
Lesson #5: Page 11
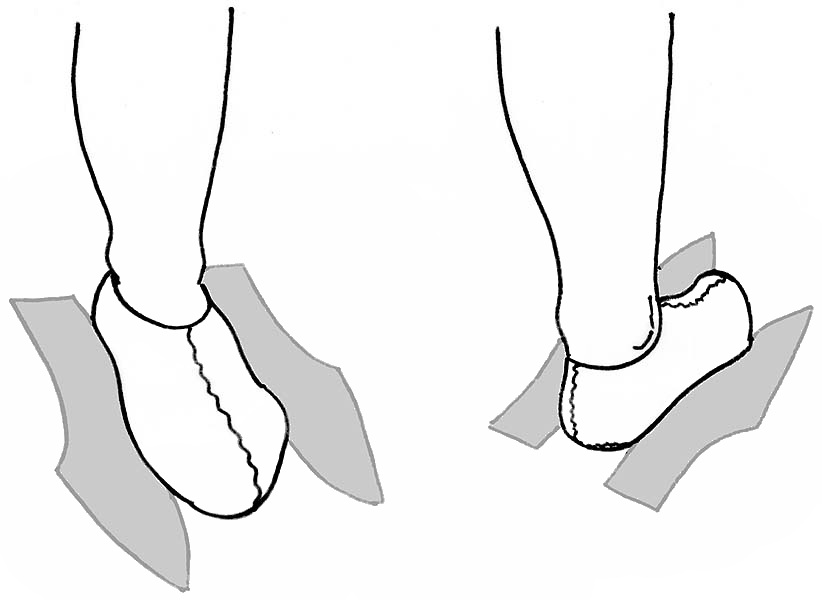
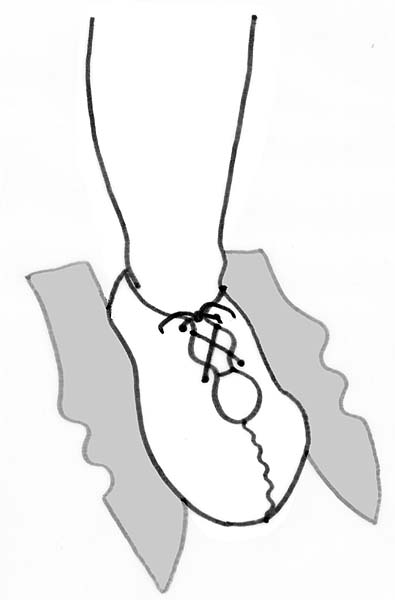
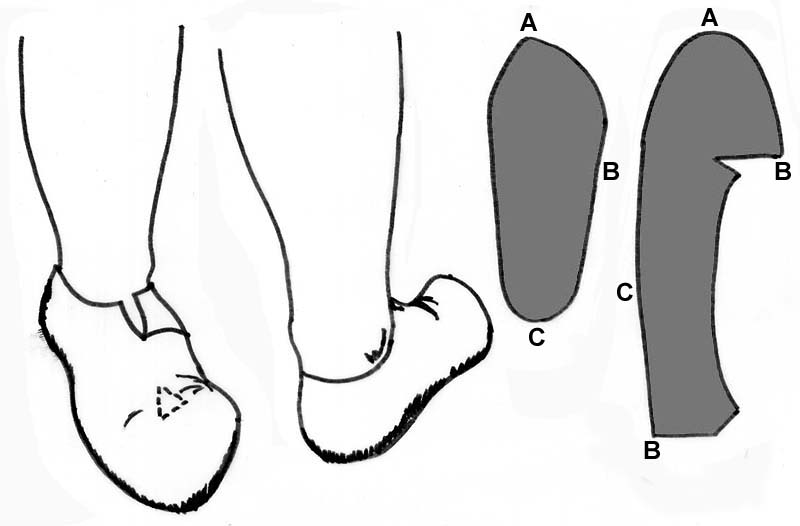
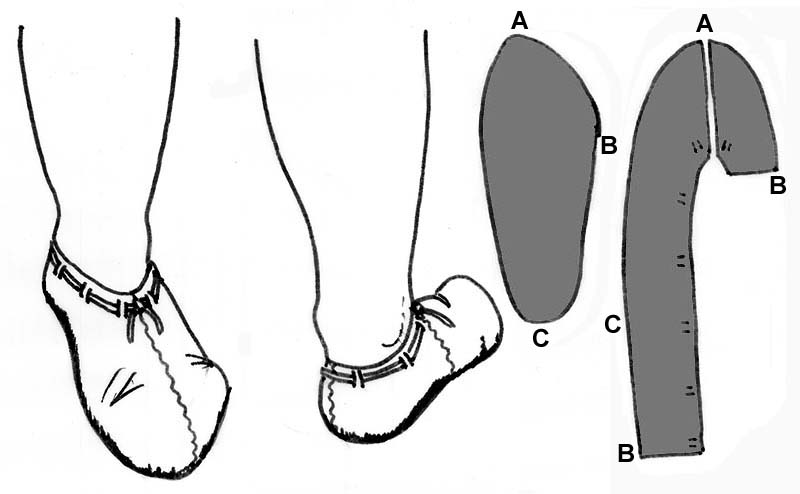
Below are sketches of several types of shoe, to give a basic selection of styles although there are many other variations on these designs. Click on image for a larger version in new window
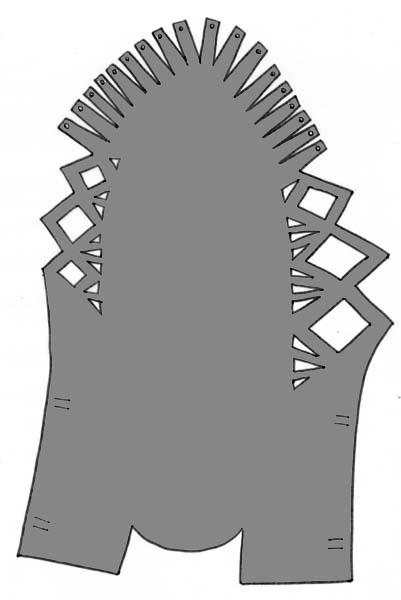
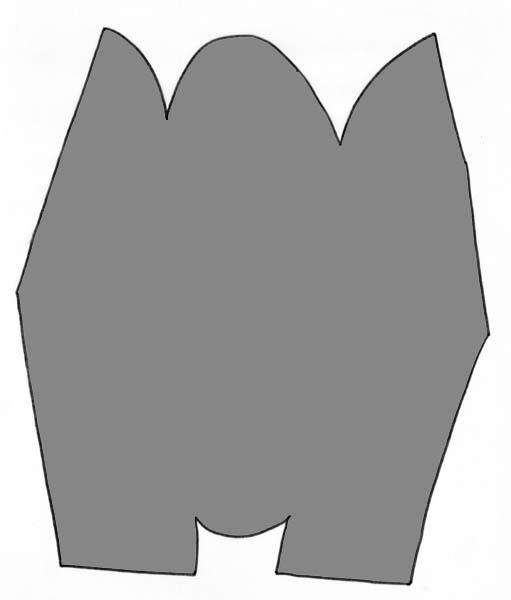
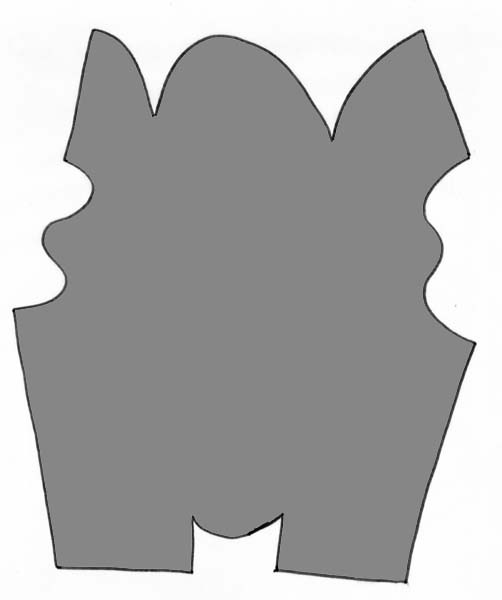
Making Patterns
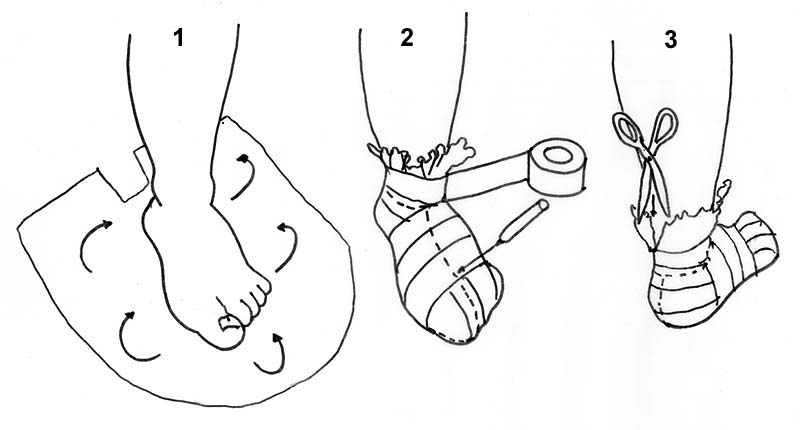
Place a sheet of newspaper on a board or smooth (non-carpeted) floor and cut it to the approximate shape shown below. Pull the newspaper around the (bare) foot and cover it in tape (including the sole). Make sure it fits tightly around your foot (it can be useful to have someone helping with this). Once the taping is done, draw the shape of the shoe, including all the seams, onto the surface with a marker pen. The next stage can be the trickiest carefully cut down the heel seam and slip the shoe off. Cut the other seams and spread the pattern out flat. If some of the edges are curled over slightly do not worry as the leather will stretch to accommodate this when you make the shoe. It is sensible to now transfer the pattern onto a piece of card. When marking out the pattern on the leather, remember to turn the pattern over to get a left and a right shoe! It sounds obvious, but it is a common mistake. You are now ready to make the shoes. Click on image for larger version in new window
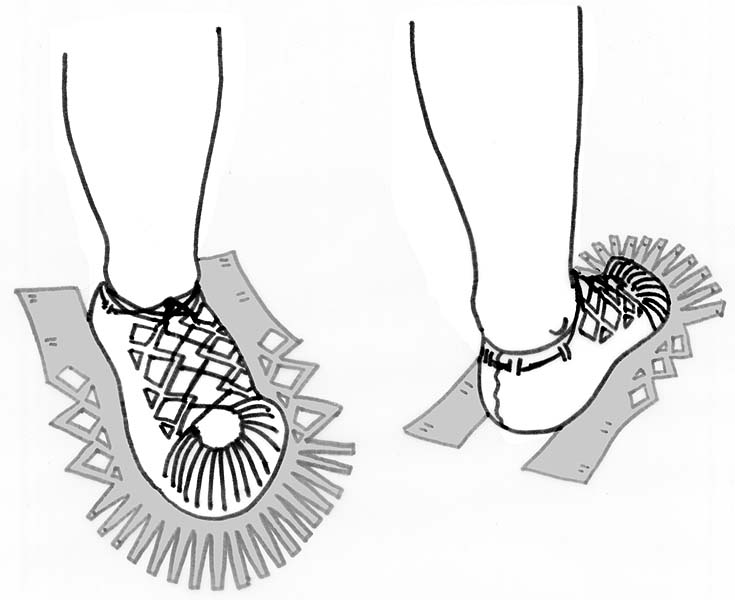
Making the Shoe
For the one-piece enclosed shoe mark the pattern out on the leather, but when cutting allow an extra 10mm or so at the heel. Working inside out, first sew around the toe, and then join the front seam. At this stage turn the shoe the right way around and try the shoe on. Check the heel is marked out in the right place (with some leathers you find that it is a bit short and needs adjusting slightly). Once you have checked the heel, cut it and turn the shoe inside out once more. Sew up the base of the heel, and then the back seam. Turn the shoe the right way out. If you wish, you can reinforce the top edge with whipstitch. The two-piece enclosed shoe is a little harder and involves more stitching. First mark out the pattern on the leather and cut it carefully, allowing a little extra (c. 2-3mm) on the upper. Working inside out, start stitching from the toe and attach the upper fully to the sole, then close the seam(s) on the upper. Turn the shoe the right way out. If you wish, you can reinforce the top edge with whipstitch. This type of shoe is the hardest to achieve a good fit on, so do not be surprised if you have to make alterations to your first attempt. Once your shoes are made you can make an innersole for them if you wish. This is not fixed in place and can be of stiff leather, sheepskin or thick felt. The simplest way to make a good fitting felt inner-sole is to simply put a layer of unspun fleece into the shoe and walk on it! If you repeat the process several times you build up a thick layer of felt fitted exactly to your foot.
|
||||||||||||||||||||||||||||||
| Costume
Classroom is a division of The
Costume Gallery, copyright 1997-2001.
Having problems with this webpage contact: questions@costumeclassroom.com |
||||||||||||||||||||||||||||||