A Short Tutorial on Cartridge Pleating a Skirt
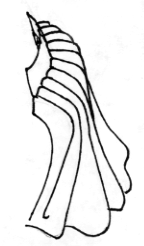
Cartridge pleating is a method of gathering large amounts of fabric to a
small waistband or shoulder armscye without adding bulk to the seam. It
also makes the fabric spring away from the waist or shoulder more than
normal box-pleating, knife-pleating or gathering does. It was fashionable
for gathering large sleeves to the shoulder on men's clothing during
the 15th century, and was
also a popular method during the 16th
century for attaching full skirts to waistbands and bodices.
Cartridge pleating must be sewn by hand, but in many cases is worth the
effort. When creating an elizabethan gown with a heavy skirt, it adds to
the period sillhouette; in some cases, the "spring" caused by cartridge
pleating can eliminate the need for a bumroll under the skirt to hold the
fabric out from the hips.
If you've never cartridge pleated anything before and plan to do it for a
skirt or sleeve, it's a good idea to take a length of the fabric you'll be
using and pleat it, using the following instructions, before pleating the
skirt or sleeve itself. This way you can work out the optimum stitch
size, gathering tightness, etc. for this particular fabric.

First, take the edge of your skirt which you plan to
attach to a waistband and fold over the edge to the inside 2 to 3 inches.
If the skirt fabric is a relatively thin one, you can add a strip
of wool, flannel, velvet, or other thick fabric inside this fold to give
the pleats more body.
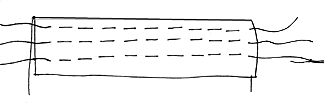
Using a strong thread (I use a silk buttonhole
twist),sew a largish running stitch half an inch away from the folded
edge of the fabric. Leave a length of thread free at the beginning and
end of the stitch. Repeat this running stitch half an inch further away
from the edge, making sure that the thread goes in and out of the fabric
at the same places as your first row of stitching did. Leave lengths of
thread free at the beginning and ends of this row, as you did the first
one. Once again, move 1/2 an inch further away from the edge and do
another row, matching the ins and outs of the above two rows of stitches.
The size of the stitches depends on the thickness and body of the fabric
you're pleating. If you're using a heavy upholstery velvet, the stitches
can be half an inch to 1 inch wide. If you're using a brocade or other
thinner fabric, make the stitches 1/4 to 1/2 inch wide. Experiment a
little, if possible, before starting on the actual clothing item.

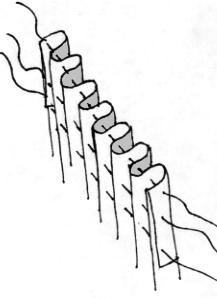
Knot the three threads together at each end. Then begin
pulling on the threads at one end, gathering the fabric as you go. It
should accordion together into deep pleats. (see picture to the right)
Ideally, you should gather the fabric tightly enough so that it doesn't
slide back and forth, but not so tightly that there's a lot of tension on
the threads. Once you've gathered the fabric, and measured it to see that
it fits the waist, knot the threads you used to gather
the pleats together so that they stay properly gathered.

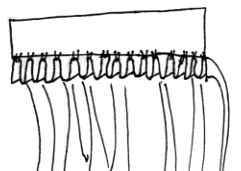
Sew the pleats to the waistband. Instead of sewing the
waistband and the edge of the fabric together as you do with normal
pleats, with cartridge pleats, you whipstitch the gathered edge of your
fabric to a finished waistband, armscye or other seam edge. Lay the
outside of the waistband/whatever against the outside of the pleats, with
the waist edge matching the edge of the cartridge-pleated fabric.
Using a strong thread, stitch the waistband to the top of each pleat
with two or three stitches.
The finished product should resemble the picture below.

Home


